Ingest custom data from a file
If the data you want to ingest is in CSV or PARQUET format, you can create a new data source and upload the files to it.
As part of ingest, you can build a pipeline of transformations to modify your data. The pipeline is not a full ETL tool, but it can make some minor adjustments to your data to make it consistent with your format. This is particularly useful if you have already ingested your initial data and follow-up data is in a different format to your initial data.
The following procedure shows you how ingesting CSV files works. It uses the Financial Report of the U.S. Government as its data. You can modify this procedure to ingest your own CSV files.
Steps
- Visit Federal Report of the U.S. Government.
- Select 1 Year under Data Range (Record Date).
- Click Download CSV File.
- Open hila’s monitoring app to the New Metadata window.
-
Open the hila monitoring application by changing the
uisubdomain in your hila URL tomonitoring. For example, if your hila URL ishttps://ui.example.site, change it tohttps://monitoring.example.site. -
Log in to the hila monitoring application using your hila credentials.
-
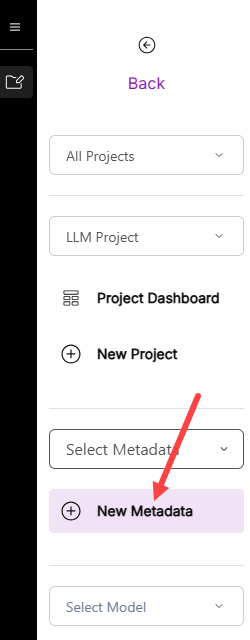
In the left navigation pane:
- Choose All Projects from the Select Projects Type dropdown list.
- Choose LLM Project from the projects list.
- Click New Metadata to open the New Metadata pane.
-
- Ingest data from the CSV file into a table.
- Click the + Add Table button.
- Enter a table name, such as
usfr. - Click Choose File to open a file browser.
- Navigate to the directory where you downloaded the CSV file and choose it.
- In the Engine field, replace
<specify_columns_selected_separated_by_commas>with the columns you want to use to sort your data (e.g.date). - Notice the Add Transformers section. You can select many transformations to apply to the data as it is ingested. For this sample exercise, you can leave the default transformations selected. They format column names to be consistent and remove white spaces from column names. You can find other available transformations in edahub under
/source/vianai/preprocessing. You can modify these for your own use or create your own. - hila automatically populates the bottom of the pane with columns names and data types from the CSV file. You can modify these columns and their data types as needed.
- Click Save Schema to save the table schema.
- Click the Save data into table below the list of columns to save the data into the table.
- At the top of the page, click Overview to return to the metadata overview page.
-
For this exercise, you store the data in a database with the default Internal clickhouse DB connection. If you want to use a different database connection, click + Add Connection and populate it with the connection information for your database.
- Click + Create new database and enter the name of the database to create, such as usfr_db.
- You can use any name for the database, but hila expects this name to contain only lowercase letters and underscores.
- Enter a name for the metadata, such as
usfr_metadata, and a description, such asUSFR metadata for USFR data.- The metadata name appears in the hila UI as the name of the datasource, so choose a name that is descriptive of the data it contains.
- You can use any name for the metadata, but hila expects this name to contain only lowercase letters and underscores.
-
Leave the rest of the fields as is. For more information about the metadata fields, see Manage metadata.
- Click Save. hila saves the metadata and populated the database.
- After hila saves the metadata, it validates it.
- When it finished validating, it shows a dialog box with a list of sample questions and runs one of them, showing the results in a table.
- Choose a question from the list to run it.
- The metadata is available in the hila UI as a datasource. Refresh the hila UI and ask questions against the data you ingested.