Configure SSO Okta dashboard
To use Single-Sign on (SSO) with Okta, you need to configure the Okta dashboard.
-
Log into the Okta website (https://www.okta.com).
-
In the left pane, click Applications > Applications.
-
Click Create App Integration.
-
Choose OIDC - OpenID Connect as the sign-in method.
-
Choose Single-Page Application as the application type.
-
Click Next.
-
In the Name box, enter a name for the application.
-
Under Sign-in redirect URIs:
- Check Allow wildcard * in sign-in URI redirect.
- Enter the URL of your hila stack. For example:
https://ui.your-stack-domain.
- Under LOGOUT:
- Enter the URL of your hila stack.
- Initiate login URI: Enter the URL of the hila stack.
- Grant type allowed: Select Authorization Code.
-
Under Assignments click Skip group assignments for now.
-
Click Save.
-
Click the Assignments tab and assign people or groups as needed.
-
Click the Access Policies tab.
-
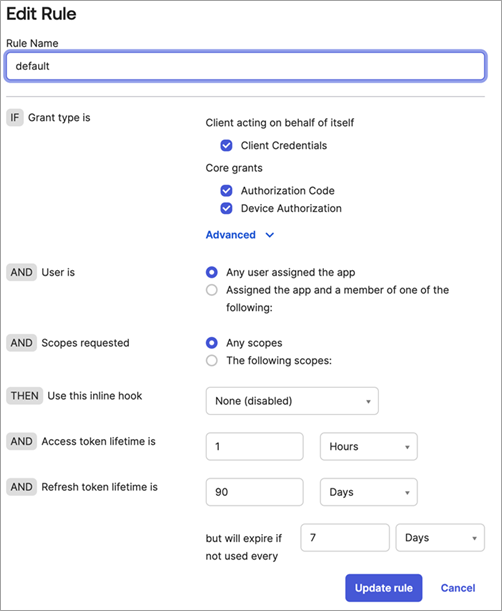
For the default rule, click the edit icon.
-
Set up the rule to look like the following image:
-
-
Click Actions and then Add Claim.
-
In the Name box, enter
groups. -
In the Include in token type box, select ID Token and Always.
-
In the Value box, enter
groups. -
Under Filter, enter
.*for the Machine regex. -
Click Create.
-
Okta is configured for hila SSO. Next, you need to configure the hila stack. For more information, see Configure Single Sign-On (SSO).
For more Okta documentation, see Okta docs.