Configure Single Sign-On (SSO)
hila support Single Sign-On (SSO) for user authentication using Azure, Okta, Auth0, and Google.
-
From the SSO provider of your choice, get the name and values of the credentials.
- Okta — For instructions on configuring hila SSO in your Okta dashboard see Configure SSO Okta dashboard.
- Azure — For instructions on configuring hila SSO in your Azure dashboard see Configure SSO Azure dashboard.
-
Configure deployment:
-
SSHinto your hila stack. -
Run the following command to edit your deployment:
kubectl edit deployment qnaui -
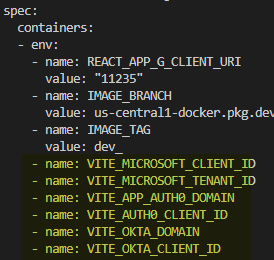
Search for the section marked in yellow in the following image:
-
Enter the value for the provider as follows:
- Azure:
VITE_MICROSOFT_CLIENT_IDandVITE_MICROSOFT_TENANT_ID - Auth0:
VITE_APP_AUTH0_DOMAINandVITE_AUTH0_CLIENT_ID - Okta:
VITE_OKTA_DOMAINandVITE_OKTA_CLIENT_ID
- Azure:
-
-
Configure hila:
-
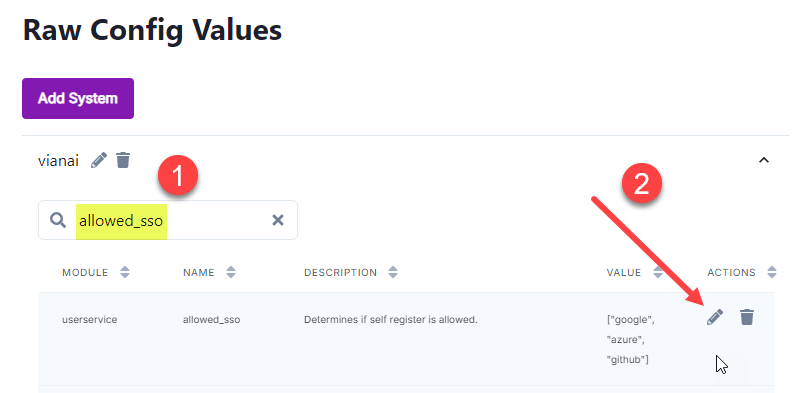
In the hila monitoring app (https://monitoring.your-stack-domain), click Settings in the bottom-left corner and then select Raw Config Values.
-
Expand the Vianai row.
-
Search for
allowed_sso. -
Hover over the row that appears and click the edit icon.
-
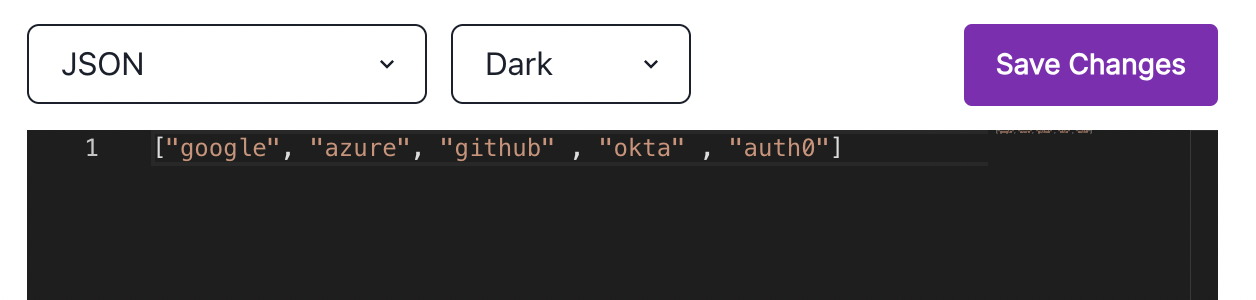
In the Edit Value pane, click Open Editor.
-
If your provider is not in the list, add it and click Save Changes.
-
Search for
oauthand make sure the row for your provider includes the credentials you added when you edited the deployment.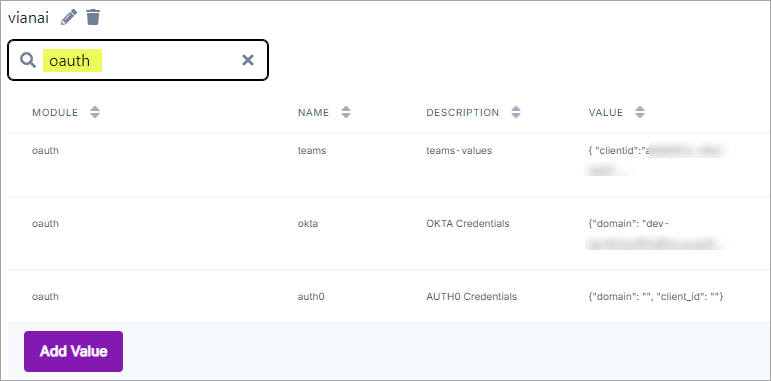
-
Search for both
self_register_allowandself_register_allow_qnauiand set them both to ‘True’.
-
Search for
allowed_domainsand add the domain of your machine.
-